My First Coat (Avid Seamstress)

I've needed a new coat for a few winters now and with my new skills I just had to try making one for myself. I decided upon the Avid Seamstress - The Coat after I was able to try on a sample at The Stitch Festival. It really helped my confidence to at least know that I was making the correct size. I made a size 12 (one size smaller than my measurements would suggest) and knew that the only adjustment needed was lengthening of the sleeves.
I spotted this subtle pink tweed on The Fabric Store website and realised it would go *perfectly* with an unknown shiny pink fabric I had picked up from The New Craft House stall at The Stitch Festival. There was one flaw in the plan - the coat pattern I had didn't actually include a full lining. It had a buggy lining and suggested binding all the raw edges. I was feeling far too lazy to do that much binding so I decided to attempt drafting a full lining instead (because that is obviously easier).
I did a lot of research to figure out the general steps to take and most of it made sense. The one part I was struggling with was how to make the lining match up with the current facing piece. I messaged The Avid Seamstress page on Instagram which ended up being incredibly helpful! It turns out they are in the process of creating a tutorial on how to fully line this coat. They sent me some draft instructions and diagrams which clarified many things I was unsure about. Since I had already cut my front facing piece I was unable to follow their instructions exactly but I cut down the red line shown on the piece below and added an extra panel of lining on each side.

I should mention that I also added far more interfacing that the pattern suggested. I interfaced the whole front facing, collar and hems - it definitely helped the final result to look more crisp.

One of the trickiest parts of this whole project was the coat vent. Since my coat has a lining, the original instructions were not very useful. I actually found the Rumana Coat sew-along the best resource on how to sew a coat vent with a lining. It was so satisfying once it all came together.


Once I had the lining in, I tried to figure out how the hem was going to work. It was quite a puzzle and I wasn't entirely sure the lining was long enough. I didn't help that after sewing one side of the hem I accidentally pressed it with the iron too hot and the lining material came apart at the seam.

After this happened I ended up taking a break from sewing the coat for a while. I was stressed that my lining was too short and I wasn't going to get the hem to hang nicely. As the weather was becoming colder here in NZ and lockdown restrictions were lifted I suddenly had new motivation to finish the coat since I actually had places to wear it! The resource that helped me the most was this video from TomKat Stitchery. I ended up shortening the coat by about 1.5cm to ensure the lining wouldn't pull on the hem. It still doesn't sit perfectly despite this, so any advice is definitely appreciated.
The final steps were sewing the buttonholes and hand sewing the buttons and vent closed. The buttons were two I was lucky enough to find in my Mum's assorted button stash. This was my first time sewing buttonholes so it took a few practice attempts, but I was pleasantly surprised that the final result looked rather neat. After that came, of course, a whole lot of pressing of the seams. I made use of a make-shift clapper and it made all the difference. The coat looked 10 times better after all the seams had been pressed (and I think it could even do with a bit more).

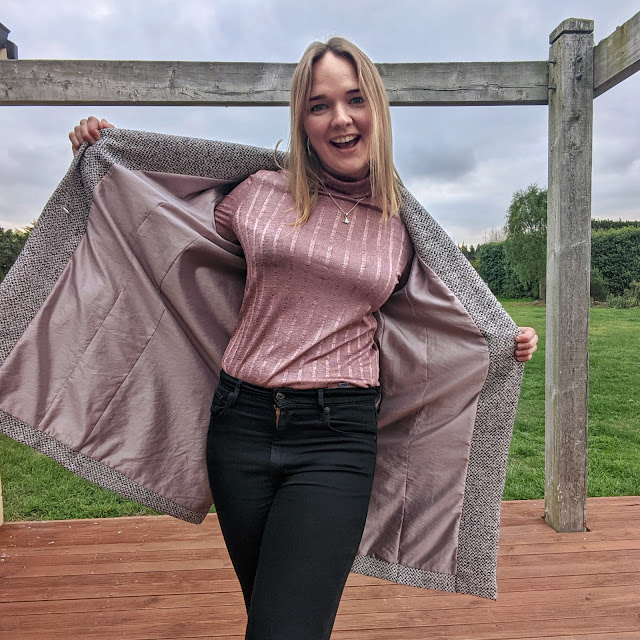


Overall, I am extremely pleased with how it turned out. It is definitely not perfect but it's probably as good as I can expect with my lack of tailoring knowledge. And I love wearing it! I'm excited to spend a while learning and researching more about coat making now that I have context for how these skills would be useful.


I am making this coat... Please please please share the details of how you fully lined it on your blog - pretty please!! Thank you ☺️
ReplyDeleteThe thing that helped me most was the tips from the Avid Seamstress - I suggest contacting them directly!
Delete